

To switch between Light and Dark Color Scheme press "Ctrl + Shift + L"
It's October ! And "October" means.. DRAWTOBER AND BLOCKTOBER !
Drawtober: Every October, artists do one drawing a day the entire month. (If you want to have an idea, check "Inktober" This year we'll call it "Drawtober" as the term has been copyrighted last year)
Blocktober Every day in October, one early blockout/layout (from games) is posted with the hashtag #blocktober.
Following this idea, we decided to create a similar challenge for 3D Environment Artists who are interested ! The #dintober-chat will be open so you can post your progress. We mods will check it regularly to give feedback and encourage you along the way !
✨Behold, the second edition of Dintober !✨
The goal of Dintober is to finish an environment in a month. There are 14 steps overall. You can define the time you use on those steps, as long as you keep the time constraint in mind (1 month) and try to post your progress once a day (even small). If you feel more comfortable, you can scramble some of them and invert them (ex : Texturing if you need a trimsheet for your structure). When posting in the channel, please state which step you're in !
The example images below are from a project I did prior to Dintober to explain the steps. Hope you find them useful!
1st step: Moodboard / Intentions. Define what you’ll be doing for this Dintober, find references of what you want to make. You can either choose a concept to follow, mix references, or sketch something yourself. If you don’t want to choose the theme yourself, you can choose in the images we propose (below). Make a list of your needs to achieve your goal.

2nd step: Blockout Macro (Big shapes). Create your main composition using low resolution assets. Do not add color yet, focus on big structural shapes, the main elements of focus.

3rd step: Blockout Micro (Medium or small Shapes). Add prototypes of elements that are secondary to add more depth to your environment. NO DETAILS. Add a camera.

4th step: Add solid color to your prototypes, do a lighting first pass to put emphasis on the important parts of your composition. (no need for unwrap at this stage).

5th step: Tweak what you already have, list and define if you need more or less things. If you don’t feel like you need it and think you should move on, move to step 6.
6th step: Prop Modeling: Architecture/Structure/Terrain (unwrap included). In the example project there was no real structure, so I considered the "ground" to be that, and made the sculpt/final shape.

7th step: Prop Modeling, Main Composition elements (final modelling of the macro prototypes) -Unwrap Included

8th step: Prop modelling: Secondary composition Elements (micro prototypes) - Unwrap included

9th step : technical stuff. If you need a skybox, water, particles, anything specific to your environment, this is the step 😊 In the example I set up the water foam and skybox base.

10th step: Texturing - Main Elements

11th Step: Texturing - Secondary Elements

12th step: Lighting pass, tweaks.

13th step: Add more awesomeness. Anything that adds more depth and sparkles to your work and feels good to add in the amount of time you have! For my scene, I made a small animation to go with it for the Sketchfab Viewer!
14th step: Portfolio time ! Present your work well... AND YOU'RE DONE ! Take your time rendering high resolution images and give some thought to your branding. If you've used a concept as reference, Don't forget to tag/credit the Concept Artist ;)


Don't know where to start? Would rather use a concept? Here are a few you could start with :
Don't forget to credit the artist if you use a concept.
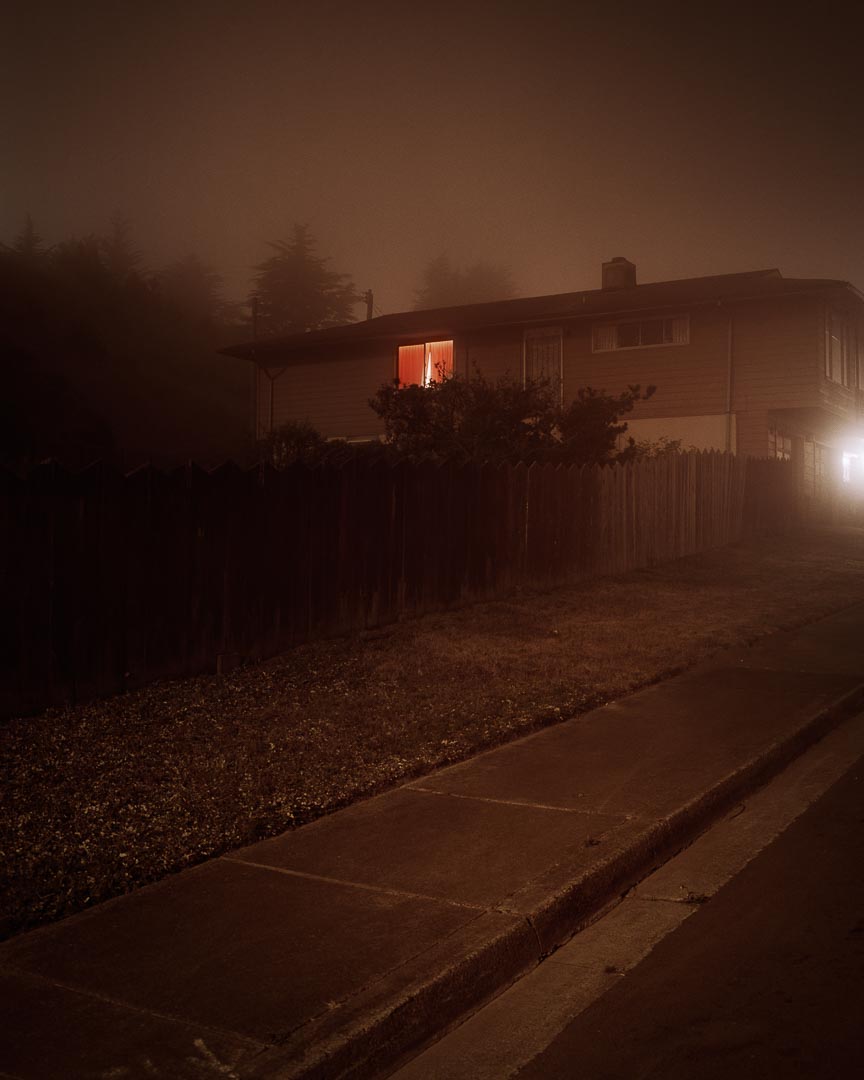
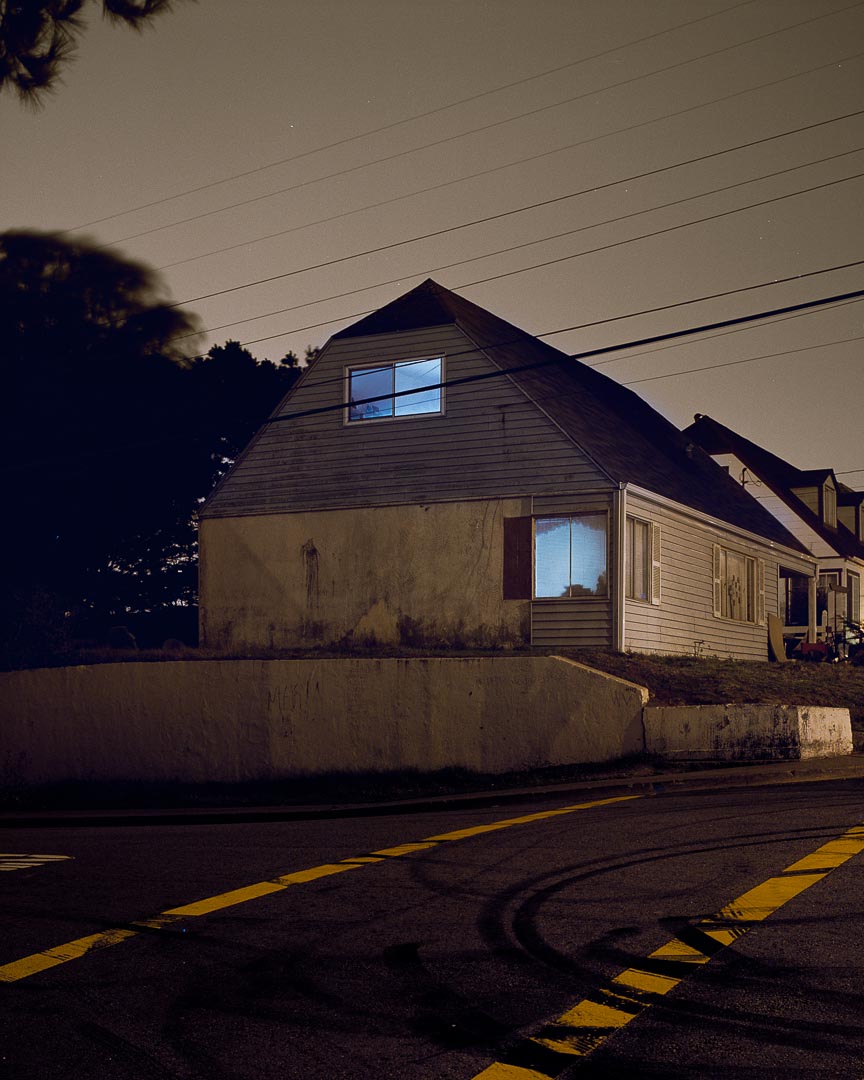
These film photographs have a very peculiar mood to them. If you want to challenge yourself with realism, these are great examples! Can you nail how the film stock renders the light values? What about the colors in post-production?
Autumn is time for forest cabins! We got both a cozy and a spooky choice for you!
Feeling like going the fantasy road? Explore these new worlds and give them your own touch!


Todd Hiddo's "House Hounting" film photography series http://www.toddhido.com/images/homes/12.jpg http://www.toddhido.com/images/homes/1.jpg
Good Arting to you !

Autumn cabin, by Madeleine Bellwoar https://www.artstation.com/artwork/ELYkQq

Boken's Bog Hut by Tony Caruana https://www.artstation.com/artwork/rRbeo2

Barkas with a barrel (the floating village) by Sergey Vasnev https://www.artstation.com/artwork/JPbPD

Heron Road by Connor Sheehan https://www.artstation.com/artwork/OymKkv
Examples of Dintober projects completed last year! Congrats to them :)


